

A move-in inspection checklist is a room-by-room record of a rental’s condition on the day the tenant gets the keys. Walk the unit with the tenant, note and photograph every room, record meter readings and keys, then both sign and date it. At move-out, you compare the two and avoid deposit disputes.
General information, not legal advice.
What is a move-in inspection?
A move-in inspection is a walk-through of the rental, done before or on move-in day, to record its condition. The result is a written report, often called a move-in condition report, backed by dated photos.
Ideally the landlord and tenant do it together. That way both sides see the same scuffs, stains and wear, and agree on what was there before the tenancy started.
Some states require a written move-in checklist and set rules for how it is given to the tenant. Rules vary by state, so check your state and local law before your next lease.
Why does a move-in inspection matter?
A move-in inspection gives you a baseline to compare against at move-out, which makes deposit decisions clearer and easier to explain. Without it, it can be one person’s memory against another’s.
A good report helps you in three ways:
- Fewer disputes: Both sides signed off on the starting condition.
- Clear records: Dated photos show what changed during the tenancy.
- Better maintenance: You spot repairs before a new tenant settles in.
Deposit limits, deadlines and allowed deductions are set by state law. Our guide to security deposit laws covers those rules, so this guide sticks to the walk-through itself.
What should a move-in inspection checklist include?
A move-in inspection checklist should cover every room, every appliance and every safety device, with a note on condition and a photo for each item. Use the table below as a starting point and adjust it for your property.
| Room or area | What to check | Photo? |
|---|---|---|
| Entry and hallways | Doors, locks, floors, walls, light fixtures | Yes |
| Kitchen | Counters, cabinets, sink, faucet, floors, walls | Yes |
| Appliances | Fridge, stove, oven, dishwasher, microwave, washer and dryer: clean and working | Yes |
| Bathrooms | Toilet, tub or shower, caulk, sink, mirror, exhaust fan, signs of leaks | Yes |
| Bedrooms | Floors or carpet, walls, closets, doors, window coverings | Yes |
| Living areas | Floors, walls, ceilings, outlets, switches, fixtures | Yes |
| Heating and cooling | Thermostat works, filter condition, vents | Optional |
| Smoke and CO alarms | Present where required and tested on move-in day | Yes |
| Windows and locks | Glass, screens, latches, door and window locks | Yes |
| Exterior | Patio or balcony, yard, parking, mailbox, storage | Yes |
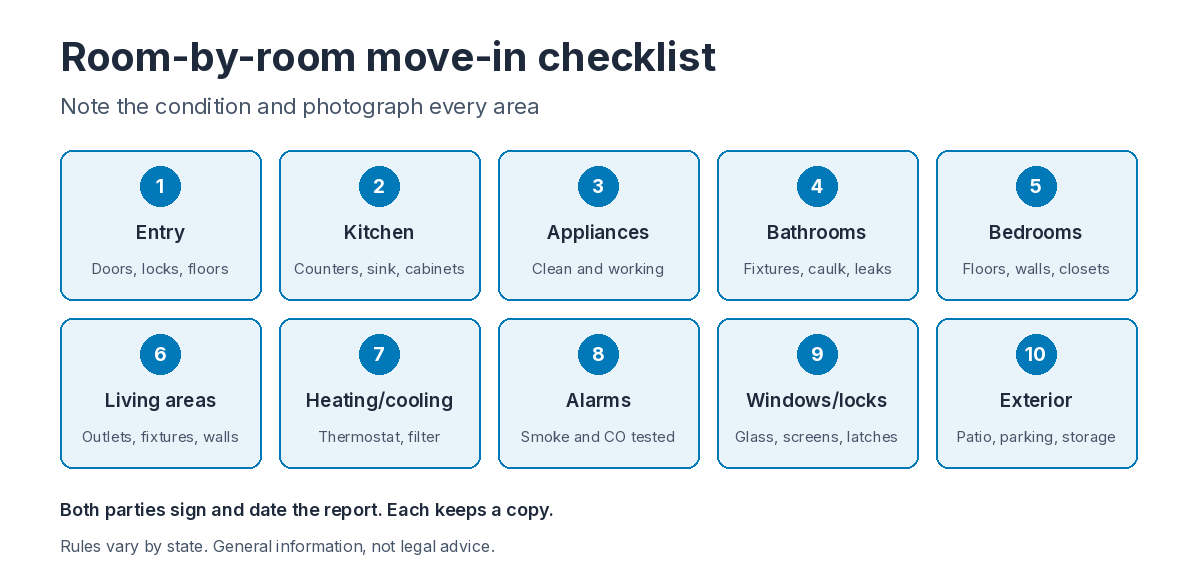
For each item, write a short, specific note. “Two-inch scratch on bedroom door, lower left” is far more useful later than “some wear.” Mark items as clean, damaged or not working, and leave room for the tenant to add comments.
How should you document the condition?
Document the condition with dated photos or video, written notes, meter readings and a record of the keys you hand over. Then have both parties sign and date the report, and give the tenant a copy.
- Photos and video: Take wide shots of each room and close-ups of any damage. Keep the camera’s date and time on.
- Meter readings: Record electric, gas and water readings if utilities transfer to the tenant.
- Keys and access: List every key, fob, remote and code you hand over.
- Signatures: Both sign and date the report. Each keeps a copy.
- Storage: Save the photos and report together in a dated folder.
Signing and sharing copies is good practice, not a universal legal requirement. If your state has its own rules for move-in reports, follow those.
Timing matters too. Do the inspection after cleaning and repairs are finished but before the tenant moves furniture in. Empty rooms are easier to inspect and photograph.
Give the tenant a reasonable window after move-in to note anything you both missed, and attach their notes to the report. A tenant who helped build the record is less likely to dispute it later.
Avoid a few common mistakes:
- Rushing the walk-through on a busy move-in day
- Writing vague notes like “fair” or “some wear”
- Skipping closets, under sinks and inside appliances
- Forgetting to photograph items in good condition
- Not giving the tenant a copy
Use the same checklist at move-out so you compare like with like, room by room and item by item.
What disclosures belong at move-in?
For housing built before 1978, the federal lead-based paint disclosure belongs in the lease before the tenant is bound by it. Under 40 CFR 745.113(b), each lease of target housing must include a Lead Warning Statement and the lessor’s disclosure of known lead-based paint or lead-based paint hazards, or that the lessor has no knowledge of them.
The required warning statement in 40 CFR 745.113(b)(1) says, “Before renting pre-1978 housing, lessors must disclose the presence of known lead-based paint and/or lead-based paint hazards in the dwelling.” The underlying law is 42 U.S.C. 4852d, which calls for disclosure before the lessee is obligated under the lease.
Other disclosures depend on your state and city. Our lease agreement checklist covers what to put in the lease itself.
Do voucher units need a separate inspection?
Yes. If the unit is rented with a Housing Choice Voucher, the housing agency inspects it too: under 24 CFR 982.305(a), the agency may not approve the tenancy or sign a HAP contract until the unit “has been inspected by the PHA and passes HQS.”
That agency inspection doesn’t replace your own move-in report. The agency checks housing quality standards, while your checklist records cosmetic condition and items the tenant is responsible for.
For the full voucher process, see our guide on how to become a Section 8 landlord.
How does screening fit before move-in?
Screening comes first: you choose the tenant using your written criteria, then do the move-in inspection with the tenant you chose. A careful inspection works best alongside a careful, consistent screening process.
Our guide on how to find good tenants covers screening steps in more detail.
Apartment One is an online platform where renters complete a verified background and credit screening once, then get matched to rental properties they qualify for, while landlords list properties for free and receive pre-screened applicants.
As a Property Partner, you list for free and receive pre-screened applicants with credit (FICO 9 from Experian), eviction and criminal screening, and you can message them in the app.
The Tenant Fit Index (TFI) is Apartment One’s 0-100 score matching a renter to a property based on credit, income-to-rent ratio, eviction history, criminal history, and lifestyle preferences. The TFI is a tool used alongside each landlord’s written criteria, not a ranking or a decision-maker.
Apartment One is FCRA-compliant and follows GLBA and CCPA data handling. Data is encrypted, and payments are processed through Stripe.
Start every lease with a pre-screened applicant.
Frequently asked questions
Should the tenant be present for the move-in inspection?
It’s best practice. Walking the unit together means you both see the same condition and can agree on the notes before signing.
Do I need the tenant’s signature on the move-in checklist?
A signature from both parties is good practice because it shows the tenant reviewed the report. Some states set their own requirements, so check your state law.
How long should I keep a move-in inspection report?
Keep it at least through the end of the tenancy and the deposit return. For a specific retention period, check your state law.
Is a move-in checklist required by law?
It depends on the state. Some states require a written move-in checklist; check your state and local rules.
Can I charge for damage that isn’t on the checklist?
It depends on your state’s deposit rules and what you can show. Clear photos and notes help either way; see our guide to security deposit laws.